


Preparing an Image in Adobe PhotoShop CC (PC)
Begin with your image open in Photoshop.
FIRST! For reasons that will become evident later, save the original file under a different name as a backup. Just trust us on this one. With that done, we can proceed.
In the main menu bar, select Image → Image Size.(or press Ctrl-Alt-I)

This opens the Image Size Dialog
In the Image Size dialog:
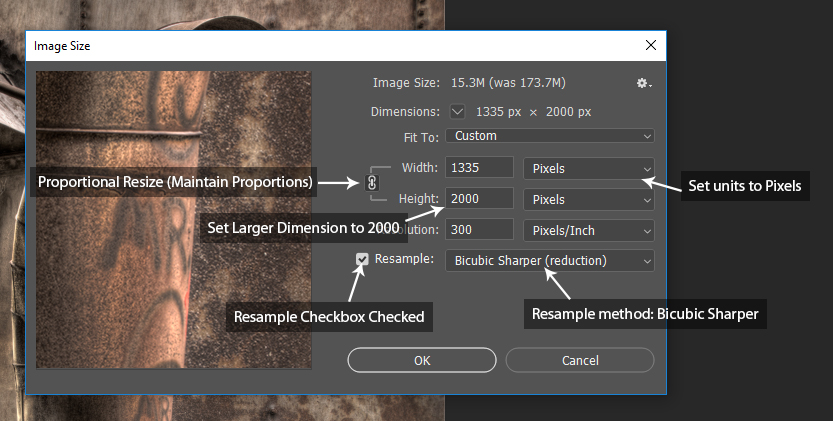
- Make sure that the Resample checkbox at the lower right is checked.
- For the Resampling method (just to the right of the checkbox), Bicubic Sharper (Reduction) is recommended.
- Above the Resample section is the Size section. Make sure the Lock Proportions option (chain link symbol to the left of Width and Height labels) connecting the Width and Height boxes is active. When it’s not active, the bar joining Width and Height is not visible and the link symbol is not highlighted. When it’s active, there is a bar joining Width and Height, and the link symbol is highlighted.
- Set the units (on the right) to “Pixels” (if Pixels is greyed out, make sure Resample is checked).
- Set the greater of the two dimensions (Height or Width), to 2000. The smaller dimension should adjust proportionately. If it doesn’t, you don’t have proportional resize on. Click the Link symbol to turn it on, (this will reset the size boxes), then try it again.
- Resolution doesn’t matter for our purposes. Just leave it as it is.
- Click OK.
This puts you back in PS, with the resized image on the screen.
In the main menu bar, select File→ Save As…
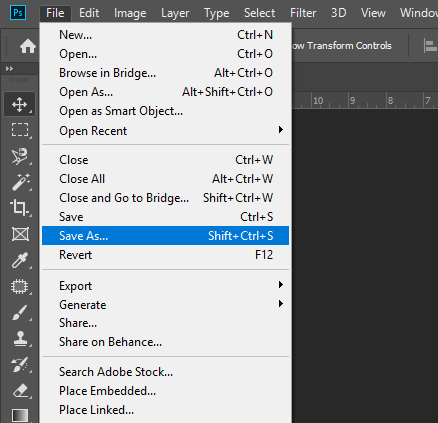
This brings up the File Save As Dialog
In the Save As dialog:
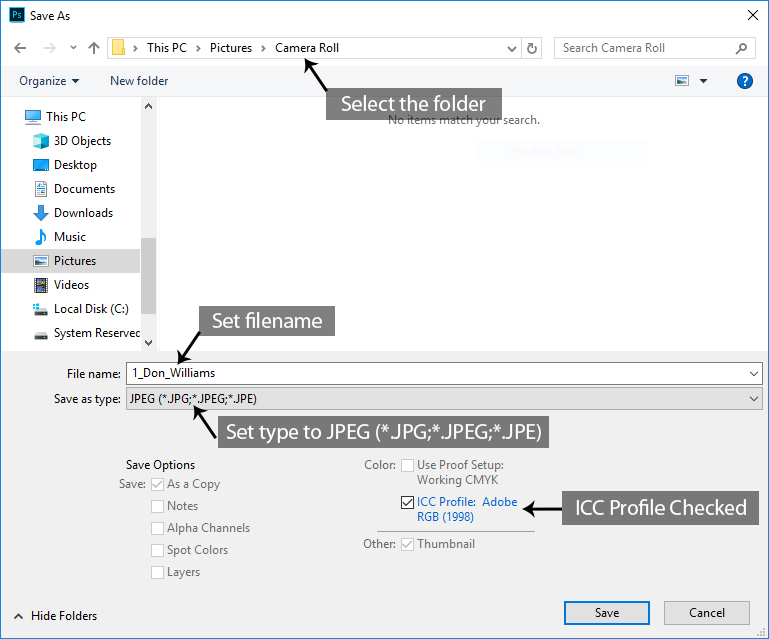
- Select the directory (folder) where you wish to save the image.
- Enter the filename for the image (our naming convention is 1_firstname_lastname and 2_firstname_lastname for your first and second images, respectively).
- In the Save as type: drop down, select JPEG (*.JPG;*.JPEG;*.JPE).
- You can leave most of the Save Options checkboxes unchecked, except two:
-
- CHECK:
- As a Copy is a safety thing
- ICC Profile
-
- (If you see a warning saying something like “Must be saved as a copy because layers etc.” that’s okay.)
- Click Save.
This brings up a JPEG Options dialog.
In the JPEG Options dialog:
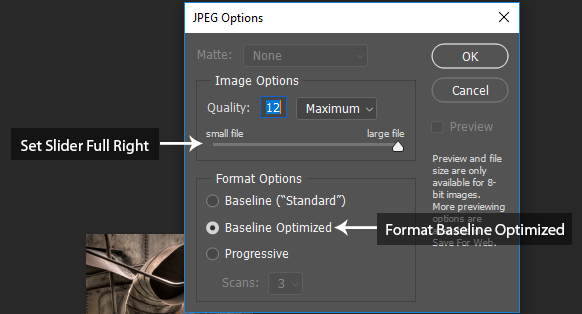
- If matte is not grayed out, select “none”.
- In Image Options, drag the slider all the way to “large file”. This will set Quality to 12 and Maximum.
- Under Format Options, Select “Baseline Optimized”.
- Click OK
You’re done!
When you close the image and/or PhotoShop, it will ask if wish to save the changes to the image. To avoid saving over the file, click “NO”. If you’re like a lot of us, you habitually click “Yes”. That’s why our first step was to create a backup copy.